Replacing interior door hardware can seem like a daunting task, especially if you’ve never done it before. However, with the right tools, some patience, and a little bit of know-how, you can easily replace door hardware yourself. Whether you're upgrading to a more modern style, or you simply need to replace worn-out handles, locks, or hinges, this guide will help you tackle the job like a pro.
In this detailed, step-by-step guide, we’ll cover everything from choosing the right hardware to removing the old components and installing the new ones. By the end, you’ll be able to confidently replace your door hardware without needing to call a professional.
Why Replace Door Hardware?
Before we dive into the how-to, let’s first address why you might want to replace your door hardware in the first place:
- Upgrading to Modern Styles: Many homeowners replace outdated hardware to align with a modern or more luxurious aesthetic. For example, swapping out an old doorknob for a sleek, contemporary lever handle can instantly elevate the look of a room.
- Better Functionality: Worn-out hardware can affect the performance of your door, making it hard to open or close smoothly. A new handle or lock can improve both functionality and security.
- Customization: Whether you want a bold statement piece or a subtle, elegant touch, new hardware can completely change the character of your interior doors.
- Increased Security: If your locks or latches have become unreliable, replacing them with newer models will enhance the security of your home, especially for bedrooms or bathrooms.
Tools and Materials You’ll Need
Before getting started, make sure you have all the necessary tools and materials. The tools you’ll need may vary slightly depending on the type of hardware you're replacing, but here's a basic list:
- Screwdriver: A flathead or Phillips screwdriver depending on the screws of your existing hardware.
- Drill: For removing or installing screws and holes, especially if you're replacing locks.
- Measuring Tape: If you’re replacing a lockset, you might need to measure the backset or door thickness.
- Hammer: For removing old hardware if it's stuck or secured with nails.
- Utility Knife: To trim any weather stripping or trim around the door, if necessary.
- New Hardware: A new knob, lever, lock, deadbolt, or hinges (depending on what you’re replacing).
- Wood Putty (optional): If you're filling old screw holes or if your new hardware doesn’t fit exactly where the old hardware was.
Step-by-Step Guide to Replacing Interior Door Hardware
1. Choose the Right Hardware for Your Door
Before you begin removing your old hardware, you'll need to pick out your replacement hardware. There are many types of door hardware available, including:
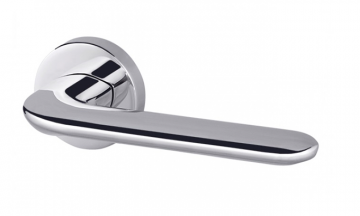
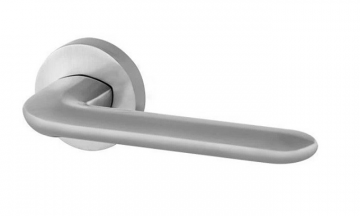
- Doorknobs: The most traditional style, with a rotating ball that operates a latch.
- Levers: A modern option, often easier to operate than doorknobs, especially for people with disabilities.
- Deadbolts: These provide extra security for bedrooms or bathrooms.
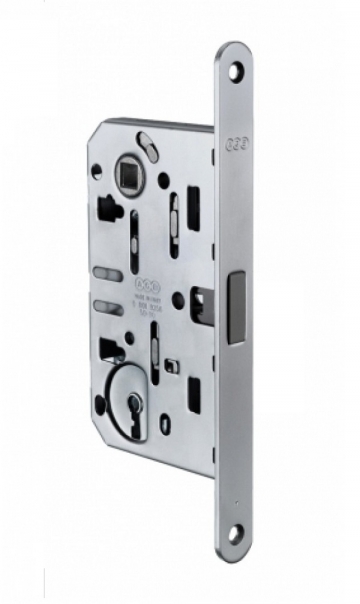
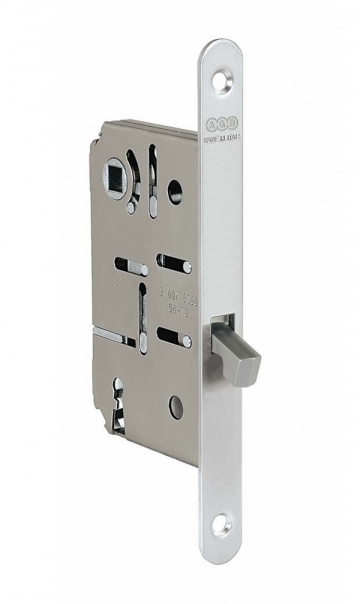
- Locks: Standard or privacy locks that keep doors secured.
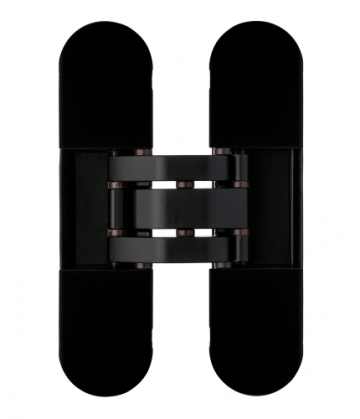
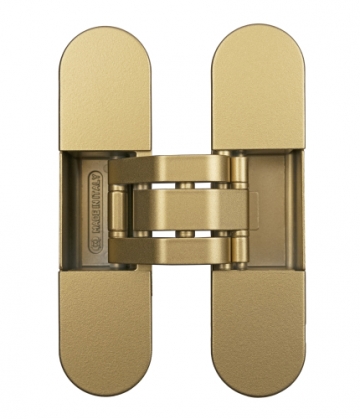
- Hinges: If your existing hinges are worn or rusty, you may want to replace them as well.
When selecting hardware, keep these tips in mind:
- Size and Style: Ensure that the new hardware matches the existing door’s size and your desired style. Measure the diameter of the holes for doorknobs and locks to ensure the new hardware will fit.
- Finish: Door hardware comes in various finishes, such as polished chrome, matte black, brushed nickel, and oil-rubbed bronze. Choose a finish that complements your interior décor.
- Backset Measurement: This is the distance from the edge of the door to the center of the lock hole. Common backset measurements are 2-3/8" or 2-3/4". Make sure the new hardware matches your existing backset.
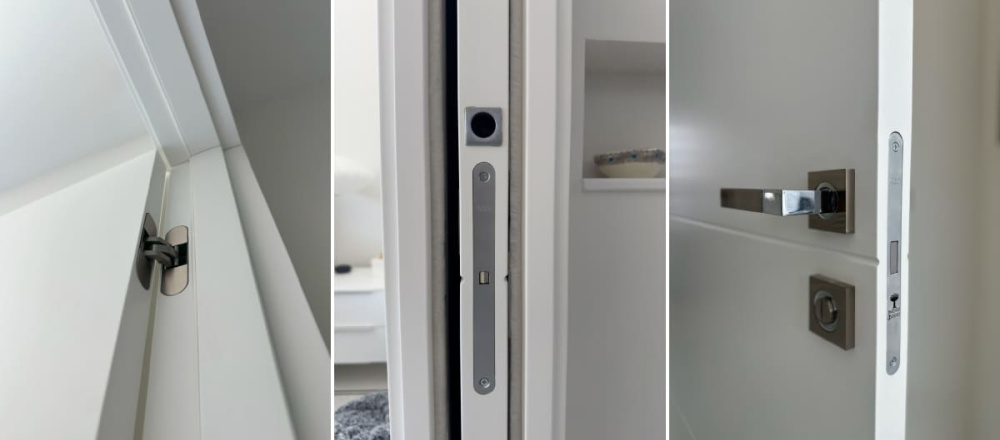
2. Remove the Old Hardware
A. Remove the Doorknob/Lever
- Unscrew the Faceplate: Use your screwdriver to remove the screws holding the faceplate (the decorative cover) in place.
- Remove the Knob/Lever: Once the faceplate is off, unscrew the knob or lever from the door. Be sure to hold the knob or lever in place to prevent it from falling.
B. Remove the Lockset
- If you're replacing a lockset, you may need to remove the strike plate on the door frame. This can usually be done by unscrewing the screws holding it in place.
- Remove the latch mechanism from the door by unscrewing it from the door edge. Keep in mind that if you’re replacing a lock, you might need to enlarge or realign the hole in the door.
C. Remove the Hinges (If Necessary)
- If you’re replacing hinges, use a screwdriver to remove the screws holding the hinges in place. If the hinge is stuck, tap it gently with a hammer to loosen it.
- Optional: If you’re replacing the hinges, you may need to remove the door from its frame. Use a friend or family member to help lift the door off the frame, or you can remove the door one hinge at a time.
3. Install the New Hardware
A. Install the New Doorknob/Lever
- Align the New Hardware: Place the new doorknob or lever into the pre-drilled hole. If the holes are too large or mismatched, you may need to fill the old holes with wood putty and drill new ones.
- Secure the Handle: Once in place, screw in the screws to attach the knob or lever to the door. Be sure to tighten them, but avoid overtightening to prevent damaging the hardware.
- Install the Backplate: If your new hardware includes a backplate, screw it into place.
B. Install the Lockset
- Insert the Latch: Slide the latch mechanism into the edge of the door and secure it with screws.
- Install the Lock: Attach the inside portion of the lockset, ensuring that it aligns properly with the latch.
- Test the Mechanism: Make sure the lock engages and disengages smoothly. Adjust if necessary.
C. Install New Hinges (If Necessary)
- Align the Hinges: Place the new hinges in the same position as the old ones. Make sure the hinge leaf aligns perfectly with the edge of the door.
- Screw in the Hinges: Use your screwdriver to insert the screws. Make sure each screw is tight, but avoid over-tightening to prevent stripping the holes.
4. Test the Hardware
Once everything is installed, it’s time to test the functionality of your new hardware:
- Open and Close the Door: Ensure the door swings smoothly and the new hardware operates properly.
- Test the Lock: Lock and unlock the door to make sure the mechanism is working as expected.
- Check the Alignment: Ensure there are no gaps between the door and frame. If necessary, adjust the hinges or latch.
5. Make Adjustments as Needed
If your new hardware isn’t functioning as smoothly as expected, don’t worry. You may need to make a few adjustments:
- Adjust the Strike Plate: If the lock is misaligned, you may need to adjust the strike plate on the door frame. Use a chisel to slightly widen the hole if necessary.
- Hinge Adjustment: If the door isn’t closing properly, adjusting the hinges might help. You can either shim the hinges or reposition them slightly.
Conclusion
Replacing your interior door hardware can be a rewarding DIY project that saves you money and gives your home a fresh new look. With the right tools, a bit of preparation, and the steps outlined in this guide, you can confidently replace your doorknobs, levers, locks, and hinges without needing a professional.
By following these simple instructions, you’ll be able to upgrade the functionality and aesthetic of your doors in no time. Whether you’re updating old hardware for a modern feel or addressing wear and tear, this project is both practical and satisfying.
For top-quality hardware options, from sleek modern designs to classic styles, check out Indigo Doors for a wide selection of premium interior door hardware that ships nationwide.