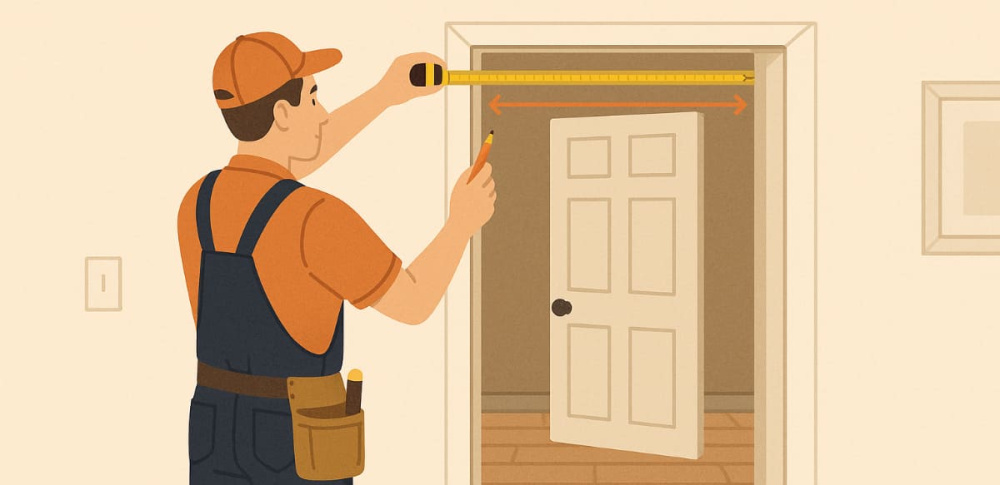
Replacing an interior door may seem like a straightforward home improvement task, but it starts with one of the most critical steps: accurate measurements. Whether you’re planning to upgrade your home’s style with modern interior doors or need to replace an old, damaged door, knowing how to measure properly ensures a perfect fit and a smooth installation process.
In this complete DIY guide, we’ll walk you through every step to measure for interior door replacement, explain the common pitfalls to avoid, and provide tips to ensure you're ready to purchase and install your new door with confidence.
Why Measuring Correctly Matters
Many homeowners underestimate how precise door measurements need to be. An interior door that’s even slightly too big or too small can lead to poor functionality, unsightly gaps, or expensive returns and adjustments. When you measure correctly the first time, you save time, money, and hassle.
This is especially important if you’re ordering a custom or prehung door online from companies like Indigo Doors, where exact dimensions are critical for fast and accurate delivery.
Tools You’ll Need
Before you begin, gather the following tools:
- Tape measure (preferably 25 ft with clear markings)
- Pencil and notepad (or phone) for recording dimensions
- Level (optional but helpful)
- Step stool or ladder (if measuring a tall frame)
- Flashlight (for inspecting tight or dimly lit spaces)
Step-by-Step Guide to Measuring an Interior Door
Step 1: Determine the Type of Door You’re Replacing
First, identify whether you’re replacing just the door slab or the entire door unit (door + frame). This affects how you measure.
- Slab Replacement: You keep the existing frame and hinges. You'll need to measure the actual door.
- Prehung Replacement: You remove the entire door unit including frame and casing. You’ll need to measure the rough opening.
Step 2: Measuring for a Slab Door
A slab door is just the door panel itself, without hinges, frame, or hardware. This is common in homes where the door frame is still in good condition.
A. Measure the Door Width
- Measure the door horizontally from left to right.
- Take measurements at the top, middle, and bottom.
- Record the widest measurement.
Standard widths: 24", 28", 30", 32", and 36"
B. Measure the Door Height
- Measure from the top edge to the bottom edge of the door.
- Take measurements from the left and right sides to ensure squareness.
Standard height: 80" (though 78", 84", and 96" are also common)
C. Measure the Door Thickness
- Use your tape to measure the thickness of the door edge.
- Common thicknesses: 1-3/8" for interior doors, 1-3/4" for heavier-duty or soundproof models.
D. Check Hinge and Handle Placement (If Reusing Frame)
- Measure from the top of the door to the top of each hinge.
- Measure the distance from the top of the door to the center of the door knob hole.
- Measure the backset (distance from the edge of the door to the center of the knob hole), usually 2-3/8" or 2-3/4".
This ensures your new slab aligns perfectly with existing hardware.

Step 3: Measuring for a Prehung Door
A prehung door includes the frame, hinges, and usually the casing. Ideal for full renovations or if the current frame is damaged.
A. Measure the Width of the Rough Opening
- Remove the trim (or measure behind it if already removed).
- Measure stud to stud at three points: top, middle, and bottom.
- Record the smallest number.
B. Measure the Height of the Rough Opening
- Measure from the floor (or subfloor) to the underside of the top stud.
- Take this measurement on both left and right sides.
- Again, record the smallest number.
C. Measure the Wall Thickness
- This determines the width of the door jamb.
- Measure from the interior wall surface to the exterior wall surface, including drywall or other coverings.
- Typical wall thickness: 4-9/16" (for 2x4 walls) or 6-9/16" (for 2x6 walls).
Step 4: Note the Door Swing and Handing
This is a vital detail when ordering a prehung or custom door.
- Stand with your back to the hinge side of the door frame (where hinges will go).
- If the door opens to the right, it’s a right-hand door.
- If the door opens to the left, it’s a left-hand door.
Don’t confuse this with the direction the door opens (inward or outward). For interior doors, most swing inward.
Common Measurement Mistakes to Avoid
- Not removing the trim: Can lead to inaccurate rough opening size.
- Measuring only one point: Always measure in multiple places for width and height.
- Ignoring the backset and hinge spacing: Essential if you're keeping the existing frame.
- Assuming standard sizes: Older homes often have non-standard door sizes.
- Skipping wall thickness: Incorrect jamb depth can make installation difficult.
When to Call a Professional
If you're dealing with non-standard openings, irregular walls, or you're unsure about your carpentry skills, it may be wise to call a door installation professional. Some companies like Indigo Doors also offer measurement and installation services or can provide expert guidance for DIYers.
Indigo Doors also has a dedicated Pre-hanging Information page on their website to help you prepare for door installation on your own. If needed, their team is available for a consultation and can guide you through the correct measurement process to ensure a perfect fit.